By the end of this lab you should be able to:
Telnet is a terminal emulation protocol that allows remote command-line access to network devices over TCP/IP. It enables administrators to execute commands on routers, switches, or servers as if they were locally connected. Telnet transmits all traffic in plain text, including credentials, making it unsuitable for untrusted networks.
enable
configure terminal
interface vlan 1
 ip address 192.168.10.2 255.255.255.0
 no shutdown
exit

line vty 0 4
 password yourVTYpassword
 login
exit

enable password yourEnablePassword
write memory
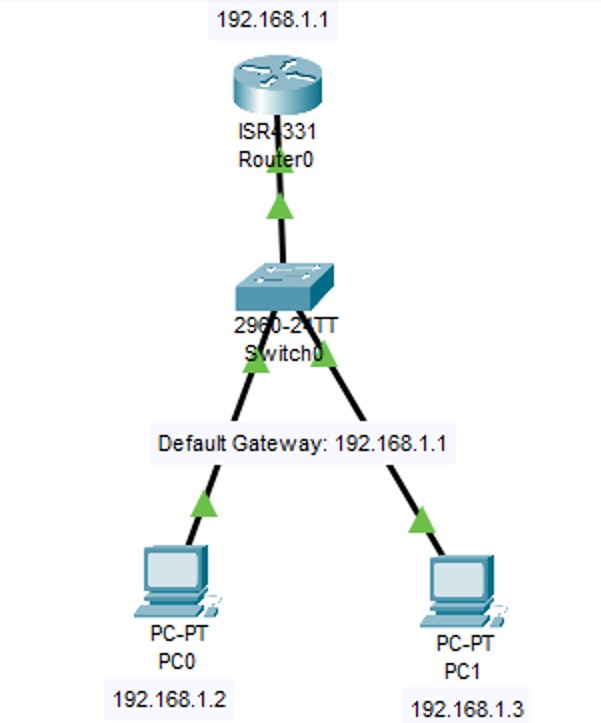
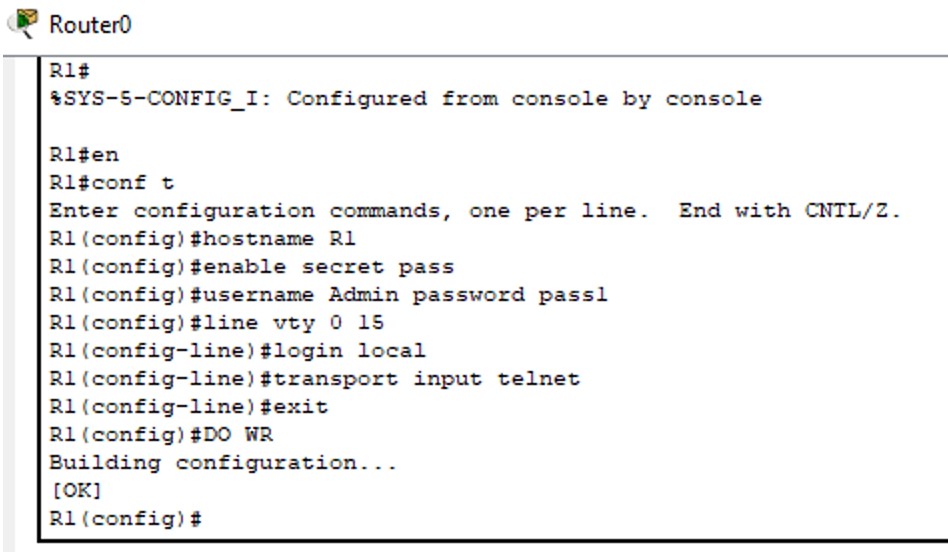
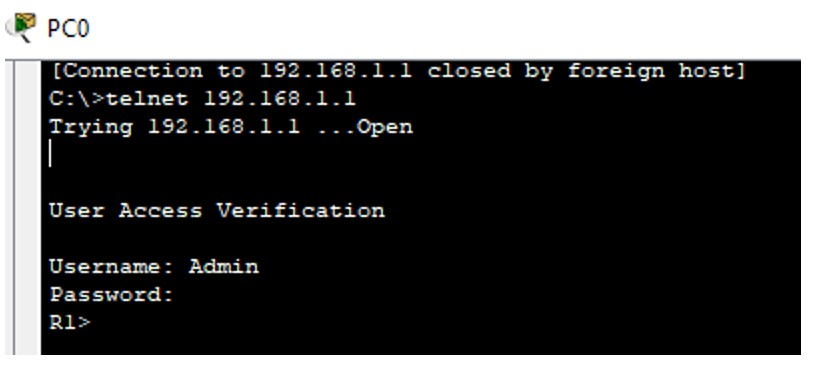

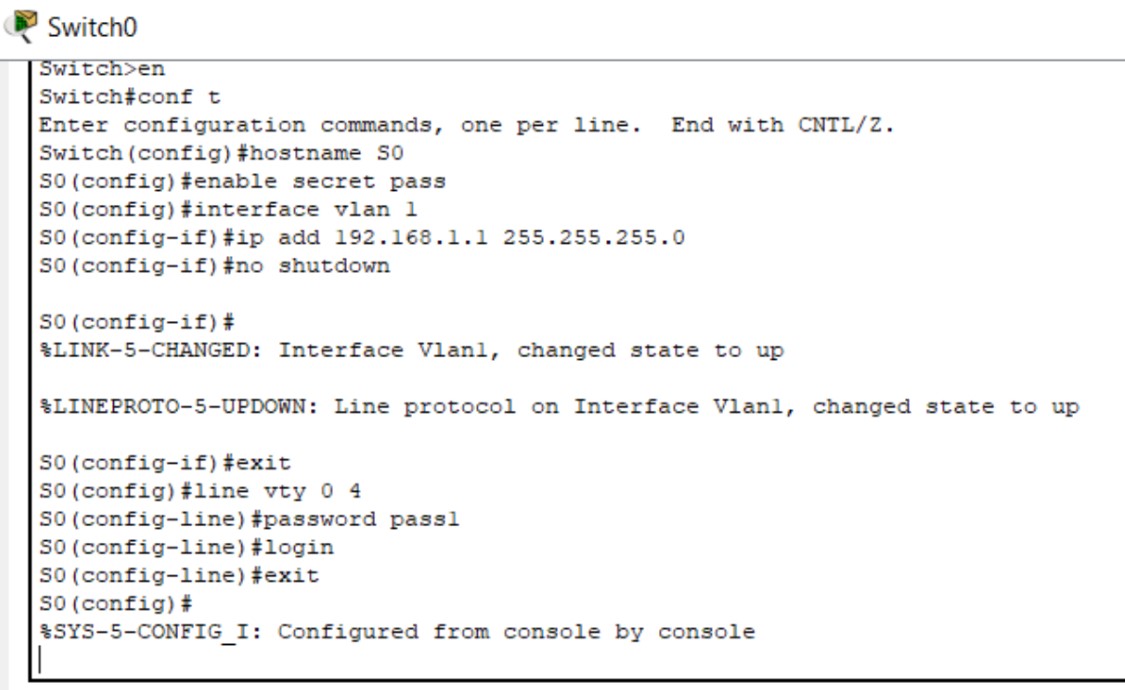

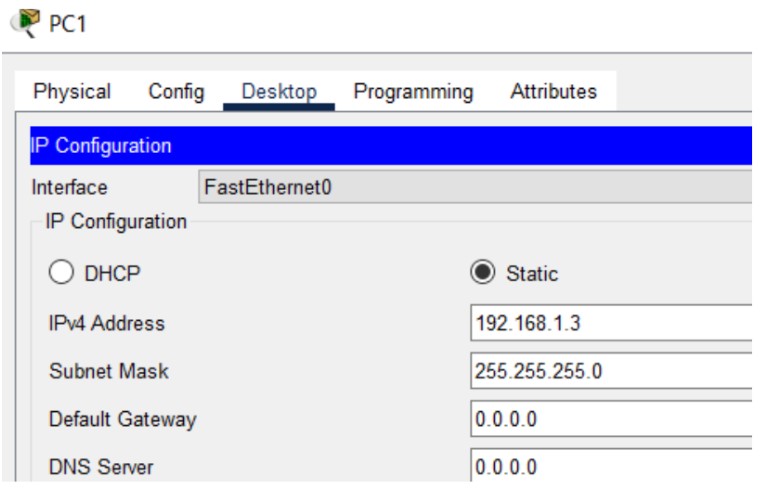
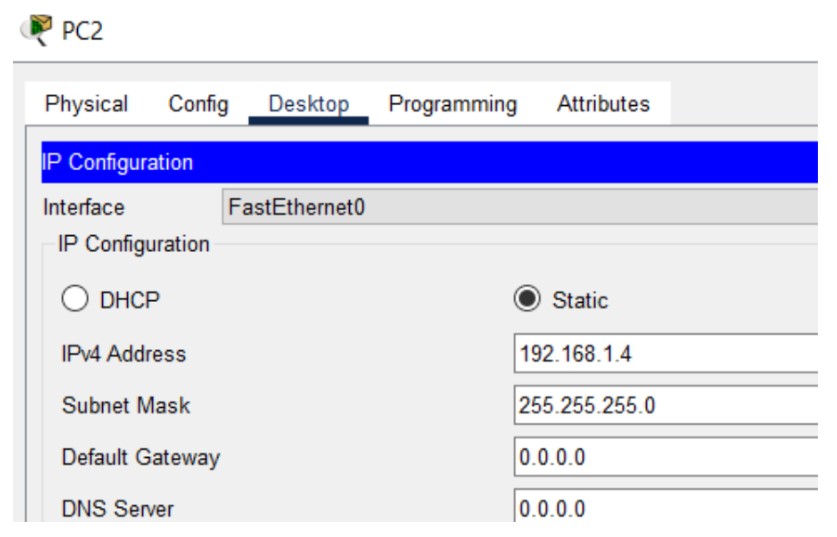
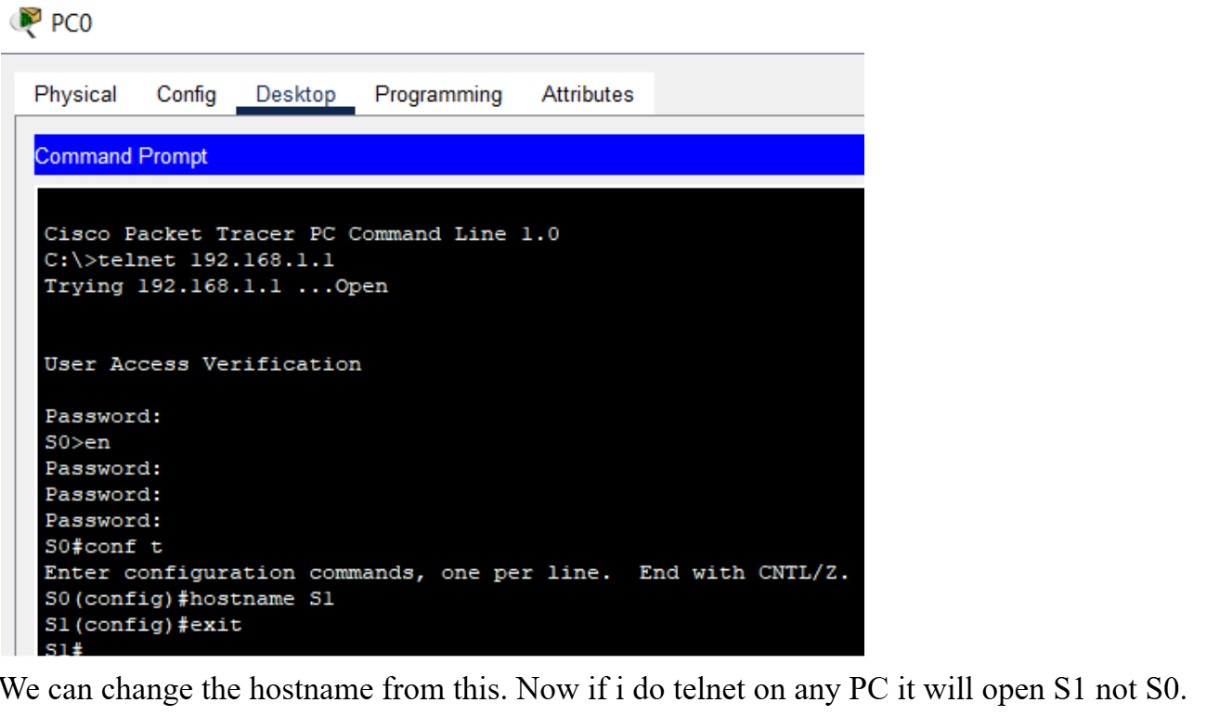
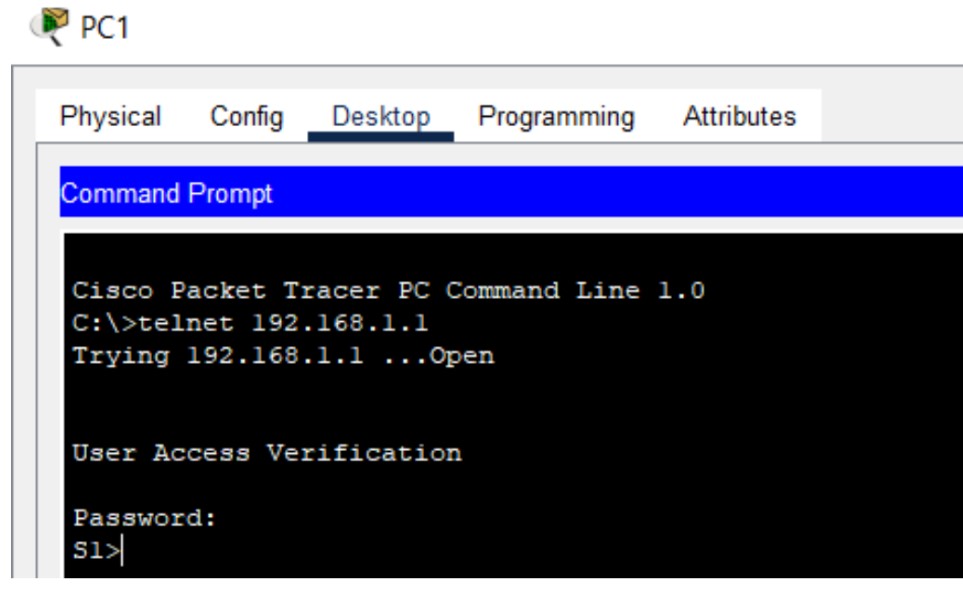
Figure 1: Telnet implementation screenshots (Topology → Config → Test).
SSH (Secure Shell) is a cryptographic network protocol for secure remote login and command execution. It encrypts all data between client and server, protecting credentials and session data. SSH supports password-based and key-based authentication and is the recommended replacement for Telnet on production networks.
enable
configure terminal
hostname Switch1
ip domain-name cnlab.local

crypto key generate rsa modulus 1024
username admin secret StrongPassword123

line vty 0 4
 login local
 transport input ssh
 exit

ip ssh version 2
write memory
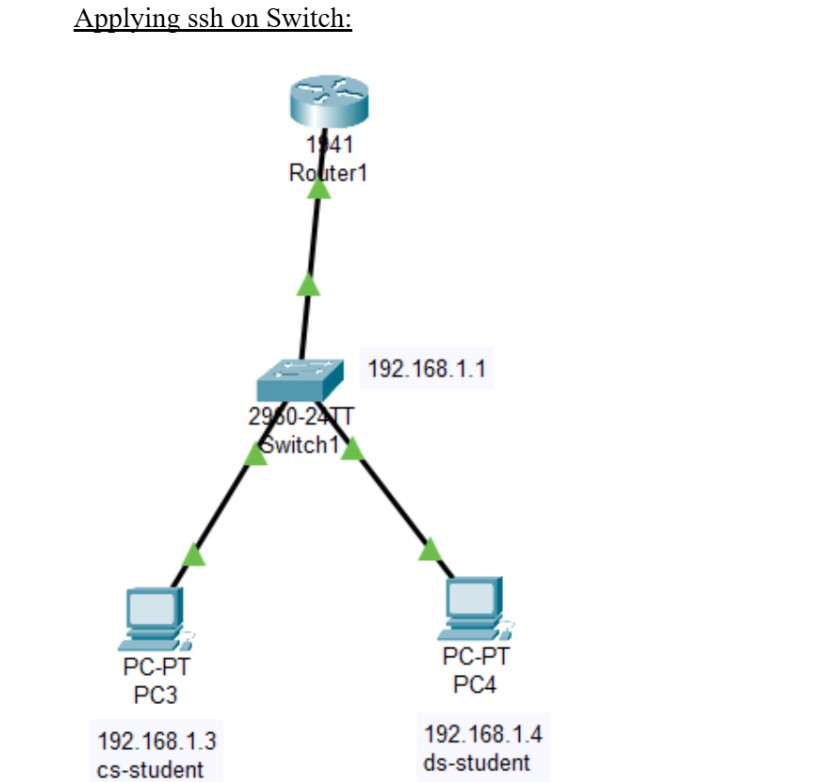
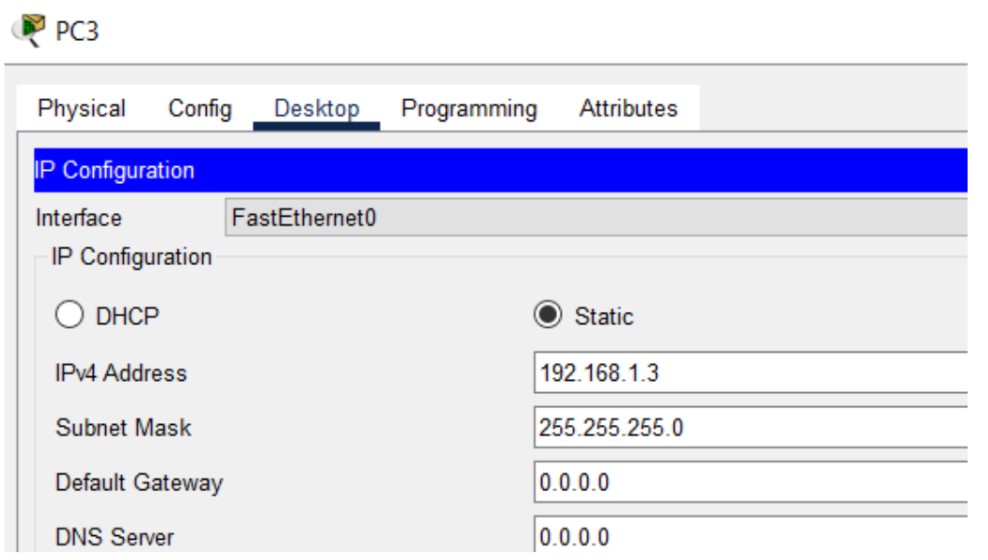
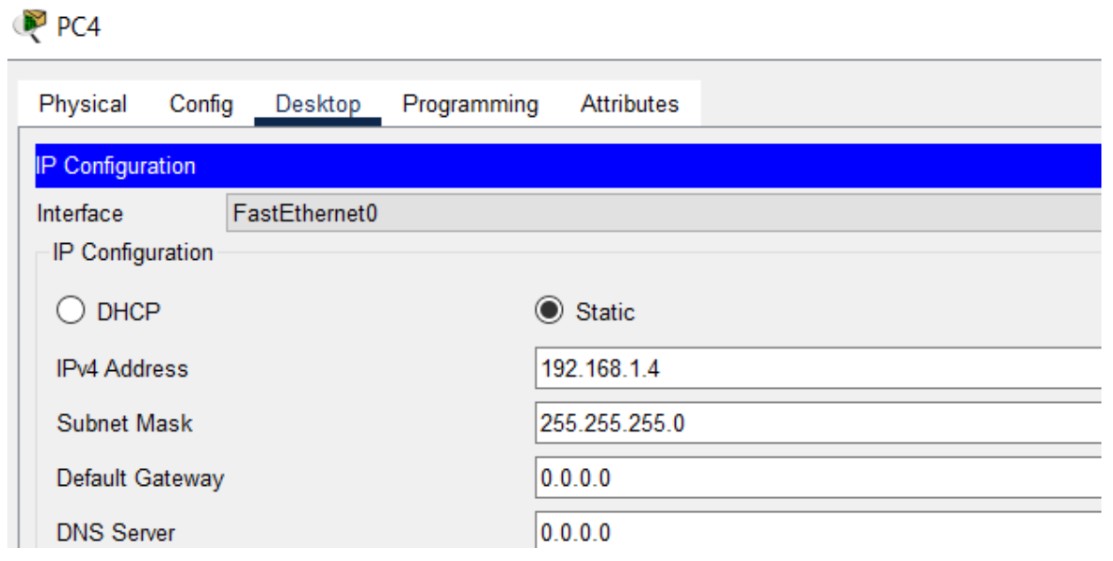
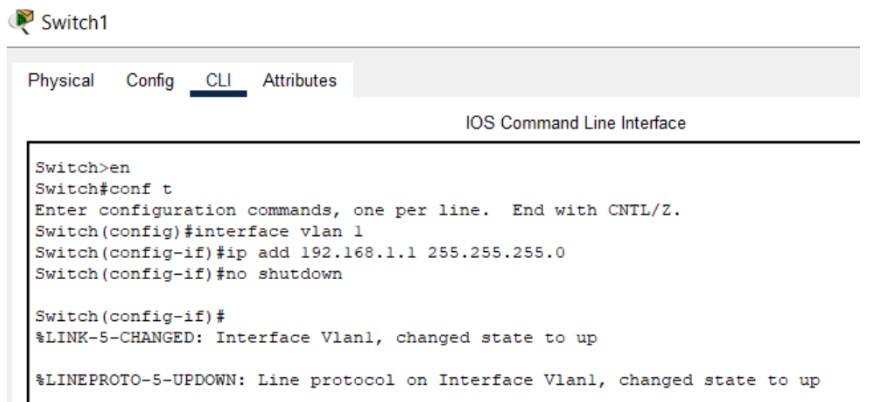
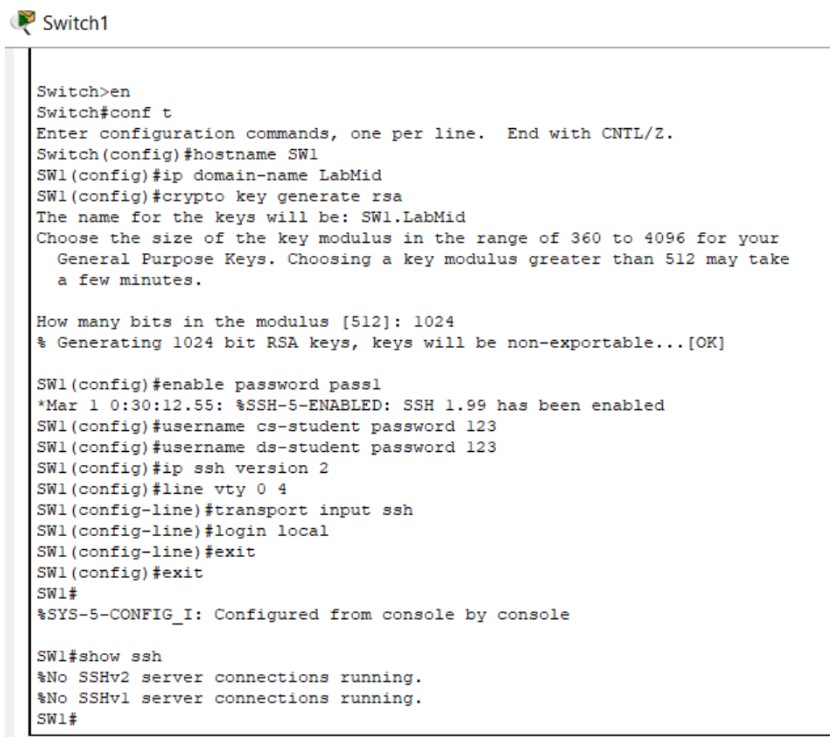
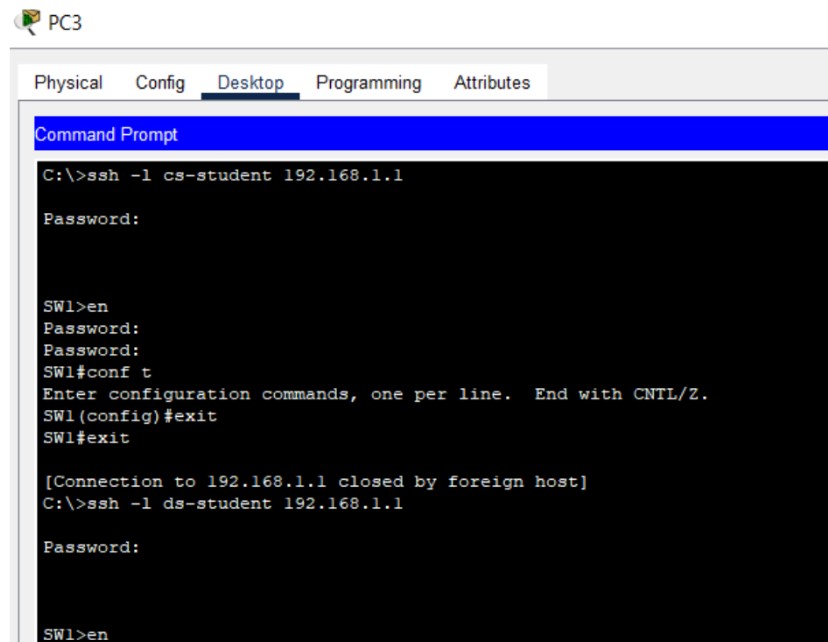
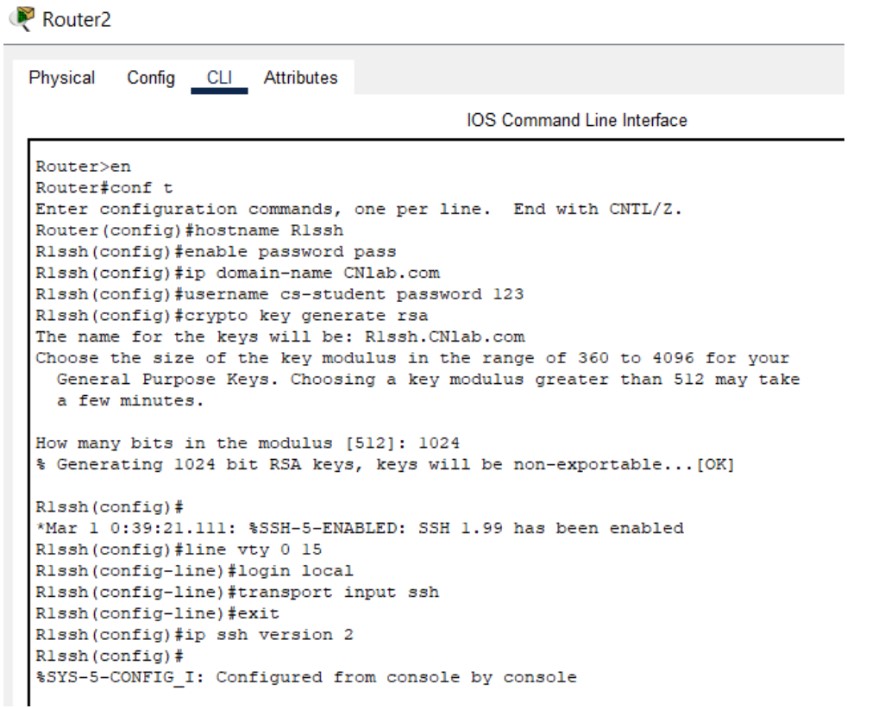
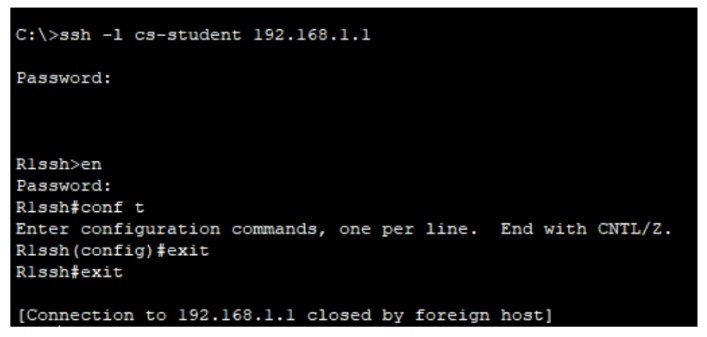
Figure 2: SSH implementation screenshots (Hostname → Keys → Login).
ping and then attempt SSH/Telnet sessions from client PCs.